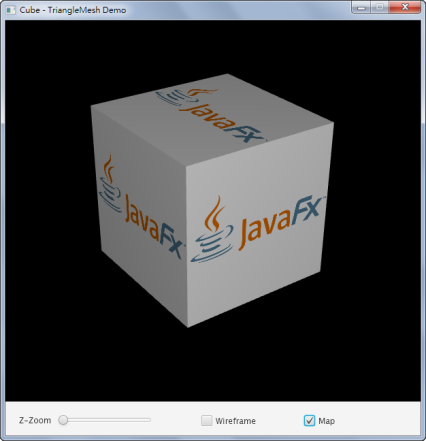
Cube
立方體 (Cube) 又稱為正六面體 (Hexahedron),以下圖為例,立方體共有八個頂點與六個面:
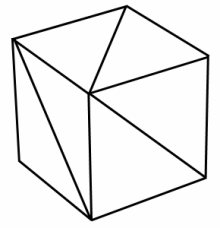
但就TriangleMesh類別而言,每一面由兩個三角形所組成,因此需設定八個頂點與十二個三角形,且每兩個三角形組成一個面,因此共有八個頂點、十二個三角形與六個面,以此組成立方體,如下圖所示:
以此類推,若面為五邊形,則由三個三角形所組成,如下圖所示:
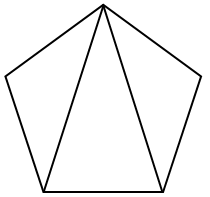
若面為六邊形,則由四個三角形所組成,如下圖所示:
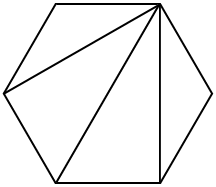
再者,若立方體的寬度、高度、深度分別為 , , ,則相對於原點 的各頂點座標依序如下,其中 , , ,可簡化為 之組合:
- 頂點0:.
- 頂點1:.
- 頂點2:.
- 頂點3:.
- 頂點4:.
- 頂點5:.
- 頂點6:.
- 頂點7:.
請參考以下範例。
程式說明
範例示範以TriangleMesh類別依序設定頂點座標、貼圖座標與三角形所組成的面,藉此組成立方體 (Cube)。
步驟一:設定頂點座標。
設立方體各頂點座標為上述之組合,則以getPoints().addAll()方法設定頂點座標的程式如下:
float w = width/2.0f;
float h = height/2.0f;
float d = depth/2.0f;

// 建立TriangleMesh
TriangleMesh trianglemesh = new TriangleMesh();

// 設定頂點座標
trianglemesh.getPoints().addAll(
   w,  h,  d,    // Point 0
   w,  h, -d,    // Point 1
   w, -h,  d,    // Point 2
   w, -h, -d,    // Point 3
  -w,  h,  d,    // Point 4
  -w,  h, -d,    // Point 5
  -w, -h,  d,    // Point 6
  -w, -h, -d     // Point 7
);
...
步驟二:設定貼圖座標。
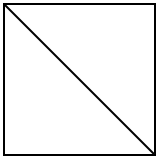
TriangleMesh類別是以貼圖的相對座標定義,並非貼圖的實際長度與寬度。以下圖為例,貼圖為一正方形,則其相對座標依序為 , , , ,須注意的是以TriangleMesh類別設定時,可自行定義相對座標的順序:
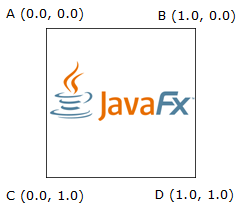
以getTexCoords().addAll()方法設定上述貼圖座標的程式如下,依序為A, B, D, C,分別為 , , , ,與上圖順序不同,可自行定義相對座標的順序:
// 設定貼圖座標
trianglemesh.getTexCoords().addAll(
  0.0f, 0.0f,    // A
  1.0f, 0.0f,    // B
  1.0f, 1.0f,    // D
  0.0f, 1.0f     // C
);
...
步驟三:以頂點組成三角形的面。
最後說明如何以頂點組成三角形的面,這也是TriangleMesh類別最特殊之處。TriangleMesh類別是以頂點的序號與貼圖的序號一起設定三角形的面,並以「右手定則」決定各面的上下方向。
各面由六個序號組成,依序為P1, T1, P2, T2, P3, T3,其中P1, P2, P3分別為步驟一頂點的序號,T1, T2, T3分別為步驟二貼圖的序號。
以getFaces().addAll()方法設定各面的程式如下:
// 設定各三角形的面
trianglemesh.getFaces().addAll(
  0, 2, 1, 1, 5, 0,
  0, 2, 5, 0, 4, 3,
  0, 2, 4, 1, 6, 0,
  0, 2, 6, 0, 2, 3,
  0, 2, 2, 1, 3, 0,
  0, 2, 3, 0, 1, 3,
  7, 2, 3, 1, 2, 0,
  7, 2, 2, 0, 6, 3,
  7, 2, 6, 1, 4, 0,
  7, 2, 4, 0, 5, 3,
  7, 2, 5, 1, 1, 0,
  7, 2, 1, 0, 3, 3
);
...
步驟四:設定各面的平滑參數。
平滑參數主要運用於使相鄰兩面邊緣平滑化,避免不規則鋸齒狀的現象,平滑參數預設為1。以getFaceSmoothingGroups().addAll()方法設定各面的平滑參數:
// 設定各面的平滑參數
trianglemesh.getFaceSmoothingGroups().addAll(
  0, 0, 0, 0, 0, 0, 0, 0, 0, 0, 0, 0
);
...
待完成步驟一至四的設定之後,則以MeshView類別建立立方體:
// 建立MeshView
MeshView meshview;

meshview = new MeshView(createMesh(200, 200, 200));
...
執行結果
以下是以線框的方式繪製立方體:
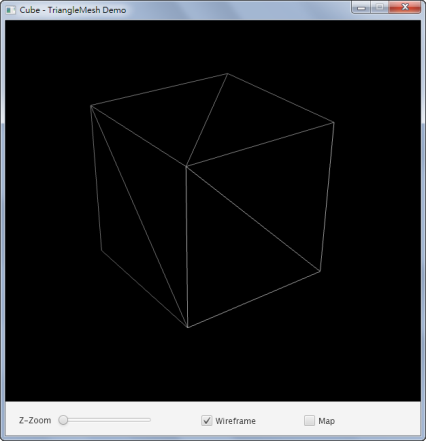
以下是以貼圖的方式繪製立方體:
